Angular
To build this app, I had to decide on a framework of development. It was possible to build this from the ground up using HTML, CSS & plain JS, but then I would loose the creature comforts that a well-designed framework brings such as scalability to screen-size, well designed premade components and a wide community that creates a support system when the average person begins their development journey.
I vetted a few main frameworks and listed their Pros & Cons below:
| Framework name | Pros | Cons |
|---|---|---|
| Angular | - Full-featured framework with built-in routing, HTTP, and forms - Powerful CLI and tooling - TypeScript-first approach - Backed by Google |
- Steep learning curve - Verbose syntax and boilerplate - Larger bundle sizes |
| React | - Component-based and flexible - Large ecosystem and community - Rich set of third-party libraries - Backed by Meta |
- Just a UI library, requires external tools for full setup - Frequent updates and breaking changes - Boilerplate for state management |
| Next.js | - Built on top of React with full-stack features - Server-side rendering (SSR) and static site generation (SSG) - File-based routing - Optimized performance and SEO |
- Opinionated structure may not suit every project - Learning curve if new to React or SSR - Some features behind enterprise licenses |
| Svelte | - Truly reactive and minimal boilerplate - Compiles to vanilla JS (no virtual DOM) - Fast performance and small bundle size - Great developer experience |
- Smaller ecosystem and community - Less mature than React/Angular - Fewer integrations and tooling options |
Ultimately, I decided on going with angular. This is because of a few reasons:
- I had previous experience with the framework
- It was made by google, so I though integrating Gemini & other google frameworks/APIs would be easier
- Had a good community
- Was less module-dependent compared to Angular, allowing for smoother development with a smaller build package.
This decision proved to be well-founded, as I was able to scale the app very well as I added more components, native and custom alike.
NGINX
Once we get the code, I had to run it on a server and expose it to a port. For the backend, I initially used uvicorn with the --port 8000 flag but moved to gunicorn with 4 workers to increase website speed and allow asynchronous requests to the backend. For the frontend, initially we used ng serve with the --port 4200 flag but moved to ng build and a static web-server with nginx to run our frontend. This, again, increased website performance & speed while also maintaining user experience by preventing an error from halting the entire website. My nginx file is:
server {
    listen 80;
    server_name studdybuddy.app;
    client_max_body_size 100M;

    location / {
    return 301 https://$host$request_uri;
    }


    location /api/ {

            return 301 https://127.0.0.1:8000;
    }
}

server {
    listen 443 ssl;
    server_name studdybuddy.app;
    client_max_body_size 100M;

    ssl_certificate /etc/letsencrypt/live/studdybuddy.app/fullchain.pem;
    ssl_certificate_key /etc/letsencrypt/live/studdybuddy.app/privkey.pem;

    ssl_protocols TLSv1.2 TLSv1.3;
    ssl_ciphers HIGH:!aNULL:!MD5;

    root /root/StudyBuddy/study-buddy/dist/study-buddy/browser;

    index index.html;

    location / {
        try_files $uri $uri/ /index.html;
    }

  location /api/ {

        proxy_pass http://127.0.0.1:8000;
        proxy_http_version 1.1;
        proxy_set_header Upgrade $http_upgrade;
        proxy_set_header Connection 'upgrade';
        proxy_set_header Host $host;
        proxy_cache_bypass $http_upgrade;
}
}
On the top we have the http:// requests. They automatically redirect to the https variant as that is much more secure. Secondly, to enable SSL/TLS in the same place, I had to use certbot to create a certificate that would auto-renew. Then, I had to force upgrade all calls to the /api/ to SSL/TLS. Furthermore, I had to increase the size of each request to a maximum of 100 Megabytes to account for any large files/notes that the user may upload and ensure that they get passed through.
This is a very conventional and standardised way of running a dual-server website (Backend & Frontend) on one machine with only one domain name. Additionally, it is very efficient and quick and taught me a lot about industry standards when it comes to deployment
Nohup
When deploying the app, I had to ssh into my server to be able to match the branch of my repository on the server with the most recent branch on GitHub. I then had to update my package dependencies and serve the frontend and backend. However, serving with the commands that I used in development would mean that the app would halt as soon as I exited my terminal window.
Frontend building
For the frontend, I simply updated packages with npm i -g and then I used ng build to build the app to a static set of HTML files that can be rendered using my nginx server. This is simple and did not require nohup.
Backend building
To build the backend, I first had to enter the python environment using source env/bin/activate. Then I had to install pending dependencies using the command pip install -r requirements.txt which would pull the requirements from the file stored in the repo. To serve the application, I used the command:
nohup gunicorn -k uvicorn.workers.UvicornWorker main:app --workers 4 --bind 0.0.0.0:8000 > backend.log 2> backend.err < /dev/null &
Let's break this command down:
1. nohup states that the command should become a background process and run without the requirement for an open terminal.
2. gunicorn is the ASGI Server that we are using that allows for workers
3. -k uvicorn.workers.UvicornWorker main:app --workers 4 Says that there should be 4 asynchronous worker processes. We can increase the number of workers by increasing the number shown in the command
4. --bind 0.0.0.0:8000 Binds the app to the server's public HTTP IP at port 8000
5. > backend.log 2> backend.err States the location of the error and log files
6. < /dev/null & tells nohup to exit the terminal window automatically.
This allows for a smooth, fluid and well-designed deployment process that prevents any cobbled-together solutions and taught me vast amounts about real-world developmental processes. This easily-deployable factor is furthered through the use of GitHub actions, which you can read about in the Improvements section.
Encryption
Under 32(1) of the General Data Protection Regulation to implement appropriate technical and organisational measures to secure personal data, all applications that aim to follow these guidelines must, as appropriate:
-
- the pseudonymisation and encryption of personal data;
- the pseudonymisation and encryption of personal data;
As I want to align with these guidelines, I had to learn about the best practices for storing sensitive user information. The most sensitive piece of information is the password, so I had to learn how to encrypt it. Initially, I used a simple cipher:
def simple_encrypt(password, shift=3):
    encrypted = ""
    for char in password:
        # Shift only printable characters
        if char.isprintable():
            encrypted += chr((ord(char) + shift) % 126)
        else:
            encrypted += char
    return encrypted

def simple_decrypt(encrypted, shift=3):
    decrypted = ""
    for char in encrypted:
        if char.isprintable():
            decrypted += chr((ord(char) - shift) % 126)
        else:
            decrypted += char
    return decrypted

# Example usage
password = "MySecret123!"
encrypted = simple_encrypt(password)
decrypted = simple_decrypt(encrypted)

Result
('MySecret123!', 'P|Vhfuhw456$', 'MySecret123!')
However, this did not have a high-degree of security and could easily be cracked by modern systems. I then chose a more modern approach, involving cryptography and 256-bit algorithms.
All passwords are encrypted before being stored in the backend. They are encrypted using Passlib's CryptContext module with 'bcrypt' as the schema. The password is encrypted with the following code:
from pydantic import BaseModel # Import module
pwd_context = CryptContext(schemes=["bcrypt"], deprecated="auto") # Identify the schema used
def hash_password(password): # Take a plaintext password & convert it to ciphertext

    return pwd_context.hash(password)
This will encrypt our password. It is extremely secure as each password is non-reversible. This results in the same input string having a variable output hash as the starting 'salt' used by the algorithm will be different. For example, an input password of 1234 could result in:
- $2b$12$zProG7RawgHpdXZ9RfxYZ.pcwZy4N29C6mRzBb8yAFvoHc5TSSyZC
- $2b$12$0DPNbWZDAX5fJl4pyBHnIuWiLk.2w/rxU/MnuKFznmjouUMjFxW5.
- $2b$12$U6PDFiGrqooLxsnHJ7X9gehpzH3tLiI./BH8oj3HejMSyZvGHPneC
- $2b$12$YJK4L0S8pcFKokWUYqf1VuDtjxy.KptvvBN9VTJIvTPTuwc36KwAe
- $2b$12$MWwHq8PHskJqF2EoGOI60..J92SVyjD5FHVc4Ugbv7ZnD10Wso6yO
- $2b$12$r5qvt.4ik//TSFaVWxWZ3uFGdmUXJL35.FXeeb2uDiWSQSZYQWv0i
With there being a large number of potential passwords based on the starting 'salt'.
To verify the value of our password, we do not reverse the hash. This is because reversing the hash is impossible. Instead, we use an inbuilt function that compares the plain-text to the hashed cipher-text. This functionality is used when authenticating a user during login and is done as such:
from pydantic import BaseModel # Import module
pwd_context = CryptContext(schemes=["bcrypt"], deprecated="auto") # Identify the schema used
def verify_password(unhashed, hashed):

    return pwd_context.verify(unhashed, hashed) # Returns a boolean
This function compares the original 'salt' and 'work factor' (Number of encryption iterations) and calculates whether the hash could have been derived from this input. If the algorithm deems it possible, then a boolean value of True is returned, otherwise the function returns False.
JWT & Tokens
JWT (JSON Web-Tokens) are vital to creating fluidity in the user web experience. Without them, the user would be required to re-login to their account every time they reloaded the page, there would be no way to discern user actions between API calls and the app would be vulnerable to various forms of exploitation due to the lack of account validation. I implemented JWT & tokens to fix this. When the frontend needs to make any request to the backend, it needs to provide a token. This token is valid for 7 days and stores the name, email and id of the user (student) that is currently logged in.
When a user attempts to login, the details they input are checked against the database. If the email and password inputted align with an email and password from the database, a token is created and sent to the frontend. The token is created using the code:
def get_user_token(student: Student):
    to_encode = {
        'details' : {'name': student.name, 'email': student.email, 'id': student.id},
        'expiry' : str(datetime.utcnow() + timedelta(minutes = ACCESS_TOKEN_EXPIRE_MINUTES))

    }
    return jwt.encode(to_encode, SECRET_KEY, algorithm = ALGORITHM)
Where SECRET_KEY is a 256-bit custom code that is used for encryption and the algorithm is HS256. This token is then stored in the user's browser data. As a result of this, the user will not have to log in to the website on every occurrence of accessing the website. The frontend injects this token into every request as shown by the code:
@Injectable()
export class CookieInterceptor implements HttpInterceptor {

    private platformId = inject(PLATFORM_ID);
    intercept(request: HttpRequest<unknown>, next: HttpHandler): Observable<HttpEvent<unknown>> { // Intercepts an incoming request

        let token: string | undefined;
        if (isPlatformBrowser(this.platformId)) {
        token = document.cookie.split("; ").find((row) => row.startsWith("token="))?.split("=")[1];
    } // Extracts the token from the web-browser

        const modifiedRequest = request.clone({
            withCredentials: true,
            setHeaders: token ? { 'token': token } : {} // Adds the token to the request
        });

    return next.handle(modifiedRequest); // Sends the request to the API
    }

}
Once the backend receives this token, it then verifies the token in every single function before even executing the intended request of the method call. This is done through the code:
@app.post("/api/function_name")
async def function_name(request: Request):
    token_res = validate_student(request.headers.get('token')) # Runs a backend function to validate the token by extracting the user details and checking the expiry of the token
    if token_res == False:

        return JSONResponse(status_code=401, content={"message": "Invalid token"}) # Prevents any functions if the token is invalid
    else:

        # Execute the intended code here
To validate the token, the code firsts calls the function validate_student():
def validate_student(token):
    try:

        res = get_student_from_token(token)
        if res == "Token Expired": # Checks if the token is past its expiry date

            return False
        else:

            # Returns details in the form of a list
            return [res['name'], res['email'], res['id']]
            # If the token is invalid, return False
    except InvalidTokenError:

        return False

    # If the token cannot be decoded, return False

    except InvalidSignatureError: # Checks if the user has tried to use token injection, resulting in an invalid token

        return False
To get the res variable, our code initially decodes the token using the get_student_from_token(token: str) function:
def get_student_from_token(token):

    payload = jwt.decode(token, SECRET_KEY, algorithms = [ALGORITHM])
    expiry = payload.get('expiry')
    if datetime.utcnow() >= datetime.strptime(expiry, '%Y-%m-%d %H:%M:%S.%f'): # Compares the expiry date to the current date based on UCT

        return "Token Expired"
    else:

        return payload.get('details') # Returns the details as a dictionary of the name, email and UID
This means that an expired or invalid token will immediately be rejected but a valid and correct token will be decoded. The app then performs all of its functions based on this data, allowing the app to extract the user's notes based on the OWNER_EMAIL property of each file, ensuring the privacy of user data and maintains the user experience.
If the app returns a 401 error due to a bad token, the frontend intercepts this error and redirects the user to a login/sign-up page, as shown in the code:
@Injectable()
export class ErrorInterceptor implements HttpInterceptor {
    constructor(private router: Router, private route: ActivatedRoute) {}
    getChildRoute(route: ActivatedRoute): ActivatedRoute {
        while (route.firstChild) {

            route = route.firstChild;
        }

        return route;
    }

    intercept(request: HttpRequest<any>, next: HttpHandler): Observable<HttpEvent<any>> {

        const modifiedRequest = request.clone({ // Clones any incoming requests

            headers: request.headers.set('X-Requested-With', 'XMLHttpRequest'),
            withCredentials: true
        });

        return next.handle(modifiedRequest).pipe( tap(() => {}, (err: any) => {


            if (err instanceof HttpErrorResponse) { // Checks if we have received an error

                if (err.status != 401 ) {

                    return;
                }

                this.router.navigate(['/login']); // Prevents the request from going through and redirects to login page instead

            }
        }));

    }

}
This all ensures that the user can use the app easily, as they do not have to specify their ID when trying to use the app's functions whilst also preventing bad actors from accessing user data.
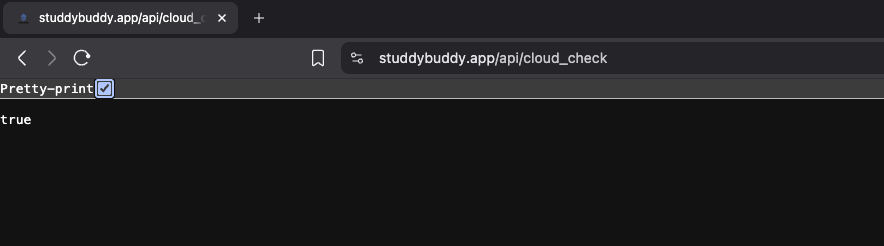
There is one exception to each API call having a token requirements. This is the cloud_check() function and is used by me to check if the API is responding to API calls. It is a simple get API call:
@app.get("/api/cloud_check")
async def cloud_check():

    return True
And was initially used by my service provider to notify me if my API goes down. This is the only potential vulnerability evident to me, and is more dependent on my provider's (Linode) protection to unauthorised IPv6 & IPv4 calls to the server. When calling the method, it should return the following page: